Brussels Sprouts

Brassica oleracea var. gemmifera

Family Brassicaceae

AnnualZones 2-11

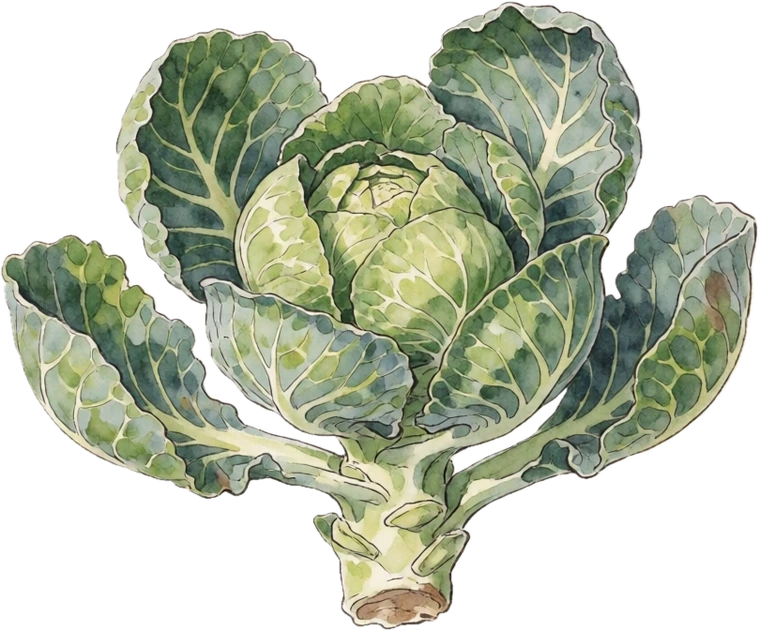
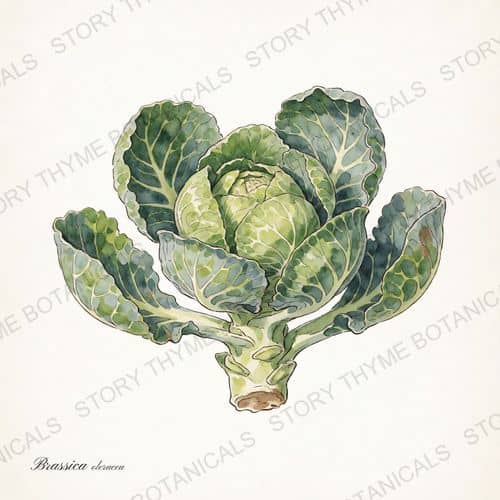
Botanical illustration of Brussels Sprouts

Everyone who hates Brussels sprouts has only met summer ones. Left standing through hard frosts, the starch turns to sugar, and sprouts snapped off a snowy stalk in November taste nutty and sweet — the holiday-table vegetable that earns its place the honest way.

The plant itself is pure spectacle — a two-to-three-foot tower studded with sprouts, picked bottom-up from October into December while the rest of the garden sleeps. It asks only a long season and a full-sun row; transplant in June and Thanksgiving comes off your own stalks.

Where to buy brussels sprouts — 6 nurseries compared

  • Full Sun
  • Moderate water
  • Slow growth
  • Excellent edible
  • Attracts bees
Brussels Sprouts — a print from the Plant Library collection

From the print shop

Growing brussels sprouts? Hang it.

Our Plant Library collection carries brussels sprouts — Brassica oleracea, print Nº 75, “Brussels Sprouts.”

526 designsfrom $12.99white or black backgroundmatte poster, unframed

Shop Plant Library botanical prints →

✓

Will it fruit where you are?

Enter your ZIP — we look up your USDA hardiness zone (2023 map) and check it against what brussels sprouts actually needs.

Life cycleBiennial, grown as an annual

Brussels Sprouts · Common problems

Common brussels sprouts problems

Pests, diseases and weather to keep an eye on.

Pests

5 problems on file

Diseases

3 problems on file

Brussels Sprouts · Growing & propagation

Growing brussels sprouts

Light, water, soil, propagation and the season’s jobs.
What it needsThe details
Light
Full Sun
Water
Steady 1-1.5 in/week
Soil
Rich, firm, limed · pH 6.5 - 7.5
Fertilizer
Heavy feeder; stop nitrogen by September

Loose sprouts otherwise

Pruning
None

Snap lower leaves as you harvest up the stalk; topping the plant in late September plumps all remaining sprouts at once.

Spacing
18-24 in

How to plant & propagate brussels sprouts

Maturity
90-110 days
From seed
Start indoors early summer for fall/winter harvest
Propagate
From seed

Brussels Sprouts · Seasonal care & spray guidance

The brussels sprouts growing playbook

Field-tested instructions for every job brussels sprouts asks of you, compiled from university extension guidance — in the order the season brings them.

When to spray brussels sprouts

Growing season. Bt program; blast aphids out of sprouts early or they colonize.

Through summer

the growing season

6 jobs
SowingIn summer

Start seed indoors in early summer for a fall crop

Sow seed a quarter to a half inch deep in a sterile mix, 4 to 6 weeks before you intend to set plants out, and count backward so the transplants go into the ground 90 to 100 days before your average first fall frost. Seedlings are ready to move out at four to five true leaves. Direct sowing works but adds roughly 20 days to the schedule. Sprouts only firm up and sweeten when they mature in cool weather, so the whole crop is timed to land its 80 to 100 day maturity window on the cold end of autumn rather than in summer heat, which produces loose, bitter sprouts.

Planting outIn summer

Set transplants 18 to 24 inches apart in full sun

Move seedlings out once they have four to five true leaves and a well developed root system, setting each at the same depth it grew in its pot. Space plants 18 to 24 inches apart in the row with 24 to 30 inches between rows, in a spot getting at least six hours of direct sun, with soil pH between 6 and 7. A Brussels sprout plant builds a tall stalk carrying dozens of sprouts and needs the room and light to feed all of them; crowded plants shade their own lower stalk, which is exactly where the first and best sprouts form.

WateringIn summer

Keep moisture even at 1 to 2 inches a week

If the planting does not get an inch of rain in a week, soak the soil deeply at least once; sandy soils need it more often. Water deeply and infrequently rather than in light sprinklings, and use drip where you can. Mulch three to four inches deep with weed-free straw or herbicide-free grass clippings to hold that moisture. Swings between wet and dry drive two specific failures here: hot dry spells turn the sprouts bitter, and interrupted water movement starves the fastest growing leaf margins of calcium, which shows up as tipburn. Drip also keeps the foliage dry, which slows the leaf spot and black rot organisms that spread in splashing water.

FeedingIn summer

Side-dress nitrogen twice, then stop before sprouts form

Work a complete fertilizer into the bed before planting, then side-dress nitrogen at about 4 and 8 weeks after transplanting, roughly half a cup of 21-0-0 per 10 feet of row, or a small band of all-purpose garden fertilizer along the row. Stop nitrogen once sprouts begin to swell on the lower stalk. This is a long-season heavy feeder that must build a big leafy stalk before it fills sprouts, but nitrogen arriving after sprout formation keeps the plant pushing soft new growth and yields loose, splitting sprouts instead of tight ones.

What to watch forIn summer

Check leaf undersides weekly for cabbageworm and looper

Starting right after transplanting, check 25 plants chosen at random once a week. A few days after you see the white cabbage butterflies or looper moths flying, look for eggs and small larvae on the undersides of leaves, and check toward the center of the plant near the leaf midribs for larger caterpillars. Bacillus thuringiensis only works on early-instar larvae, so the entire treatment decision depends on catching the generation while the caterpillars are still small. Once they are large and feeding down inside the developing sprouts, no spray reaches them and the damage is already in the harvested part.

ProtectionIn summer

Cover new transplants with floating row cover

Lay a lightweight floating row cover over the bed right after transplanting and seal the edges to the soil. Leave it on through the first weeks of growth, lifting it only to weed or side-dress. Use a lightweight material so temperatures do not get too hot underneath, and vent or remove the cover during summer heat. Flea beetles, cabbage maggot flies, and the moths that lay cabbageworm and looper eggs all find the plants at the seedling stage, when a few days of chewing can set a transplant back for the whole season. A cover is a physical barrier that never needs a pesticide, and since this crop is harvested long before it ever flowers, excluding insects costs no pollination.

Harvest time

as it ripens, and picking

3 jobs
PruningBefore harvest

Top the plant when the lowest sprouts reach half an inch

When the sprouts at the bottom of the stalk are a half to one inch across, cut one to two inches off the very top of the plant, taking out the growing point. Do this only inside the last 60 days before your intended harvest. Strip the lowest leaves as you go to speed the sprouts below. Removing the apical growing point stops the plant from spending sugar on new leaves and new sprout buds it will never finish, and redirects it into the sprouts already set, so the upper ones size up and the stalk finishes evenly. Topping too early just costs you the leaf area that fills the crop.

SprayingBefore harvest

Cabbageworm and looper: treat at sprout formation

As sprouts begin to form on the stalk, spray Bacillus thuringiensis subspecies kurstaki if you find one or more caterpillars in 25 plants. Time it to when eggs are present or larvae are still small, cover the leaf undersides, and add a spreader-sticker to help it stay on the waxy leaves. The Bt crystal protein has to be eaten and only binds receptors in the midgut of caterpillars, so it kills the worms while leaving the parasitic wasps and predators that suppress the next generation alive. Sprout formation is the threshold moment because that is when caterpillars stop being a leaf problem and start boring into the part you eat.

HarvestingAt harvest

Pick bottom-up after frost, and read the low temperature

Twist off sprouts that are firm, compact, and 1 to 1.5 inches across, always working from the bottom of the stalk upward as they size. Leave plants standing through light frosts. They hold in the garden as long as temperatures stay above 20 degrees F; once the mid-twenties arrive, strip the leaves and either harvest everything or pull the whole stalk and stand it upright somewhere cold to pick from over the following weeks. Frost is not damage here, it is the finishing step: cold makes the plant convert starch to sugar in the sprouts, which is why fall-matured sprouts taste sweet and mild and summer ones taste bitter. Below about 20 degrees F, though, the sprouts themselves start taking injury rather than sweetening.

Brussels Sprouts · Calculators & field guides

A little help in the garden.

Calculators for the figures. Field guides for the hands-on work.

Brussels Sprouts · Yearly calendar

The brussels sprouts year, month by month

What brussels sprouts asks for, month by month.

Jan

No calendar activity is listed for this month.

MonthJanFebMarAprMayJunJulAugSepOctNovDec
Harvest

HarvestOctober to December

What each band means

  • Harvest — picking time — check ripeness every few days.

These are the species' typical months — expect them a few weeks earlier in warm zones and later in cold ones. Watch the plant, not just the calendar.

Brussels Sprouts · Ecology & uses

Ecology & uses

What it does for the garden, and what it is grown for.
Botanical illustration of Brussels Sprouts

Brassica oleracea var. gemmifera

Brussels Sprouts in the garden system

  • Herbaceous layer annual
Attracts
Bees
Moisture
Facultative / average
Deer
Browsed

Protect young plants

Origin
Introduced

What brussels sprouts is grown for

✓ Commonly eaten

Use
Roasting
Use
Holiday table
Use
Winter garden
Edible value
4/5

Harvesting & storing brussels sprouts

October - December — ALWAYS after frost; pick bottom-up. About 90-110 days from planting.

Edibility, identification, and traditional-use notes here are general reference — not medical or veterinary advice, and not a claim that any plant treats or prevents anything. Medicinal ratings record how strongly a plant features in herbal tradition, nothing more. Never eat or dose a plant you have not positively identified. More on how to use this library.

Brussels Sprouts · Varieties & cultivars

Best brussels sprouts varieties & cultivars

There are far more than these — the ones below are the named varieties of brussels sprouts people actually plant.

Named varieties of brussels sprouts differ in winter-chill needs, ripening time, hardiness, and whether they set fruit on their own — pick one that fits your climate.

10 varieties

Long Island Improved

Ripens
fall
Zones
2-11

The open-pollinated heirloom standard, listed by UGA Extension as a recommended home garden cultivar at about 90 days.

Where to buy ‘Long Island Improved’verified

Story Thyme Farms may earn a small commission from these links, at no cost to you — it never changes what we recommend.

Sources & plant identity

Know what you’re growing.
See where the knowledge comes from.

Botanical illustration of Brussels Sprouts

Brussels Sprouts

Brassica oleracea var. gemmifera

The plant, at a glance.

Botanical name
Brassica oleracea var. gemmifera
Plant family
Brassicaceae
Growth habit
Annual · Biennial
Origin
Introduced
USDA plant symbol
BROL
Invasive risk
Low
Every garden is different.

Hardiness, size and timing vary with your cultivar, soil and climate.

Rooted in research.

University extension research, brought together with hands-on growing experience at Story Thyme Farms.

Explore Brussels Sprouts’s sources6 reference links
for Brussels Sprouts

Questions

Brussels Sprouts questions, answered straight.

Is brussels sprouts safe for kids and pets?

Brussels Sprouts is commonly eaten and isn't considered toxic, but "commonly eaten" isn't a guarantee for any particular person or animal — allergies, quantity, and which part you eat all matter. Never eat a plant you haven't positively identified, and check with a vet before letting pets or livestock graze anything new.

When do you harvest brussels sprouts?

October - December — ALWAYS after frost; pick bottom-up. From planting, expect about 90-110 days to maturity.

How do you propagate brussels sprouts?

From seed.

Elsewhere

Where brussels sprouts sits in the library.

Where brussels sprouts sits in the library

Grows in the same world